
Part 1 of 2
I wrote this tutorial for my classmates that never had used Git, GitHub or any version control before. So it is done in a basic level and I have purposely left out details to make it easier to get started. If you are new to version control and Git I recommend you to read up on the subject, learn to understand what, why and how. When I first started with Git our teacher only let us use the terminal to learn the commands, and really understand the process. Today I still prefer to use the terminal but it also makes it easier if using a GUI when we know what happens “under the hood”.
Before we start this tutorial we should clarify the fact that Git and GitHub is not the same thing. I will explain the core differences:
| Git | GitHub |
|---|---|
| A software | A SaaS, Software as a service |
| Manages source code | Hosting service for git repos |
| Installed locally | Hosted on web |
| version control & code sharing | source code hosting |
| command line tool | GUI, Graphical User Interface |
Now, let´s get back to the tutorial.
How to create a project
Our colleague has created a project that we later will download(clone) from GitHub and we will add new code and send it back to GitHub (commit & push) but that will be done in the second tutorial.
This one is to show how our colleague did to create a new project and add the first code. So below we will go thru that process.
First, we need to create a place on our computer where we want to store our project folder.
(This is the same as you would go to file explorer and select create new folder).
- Open your terminal (Git bash, iTerm, cmder or whatever you prefer to use)
- Go to root (as close to the hard drive we can put our directory)

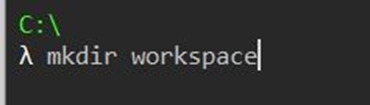
- Use cd .. to step back down closer to root so you get here:

Now we are going to create a new folder called workspace, it is good to have a folder we always use for our projects, so we easy remember the path.
We use the command mkdir workspace
What we did here: We created a folder on our local computer where we can add projects:
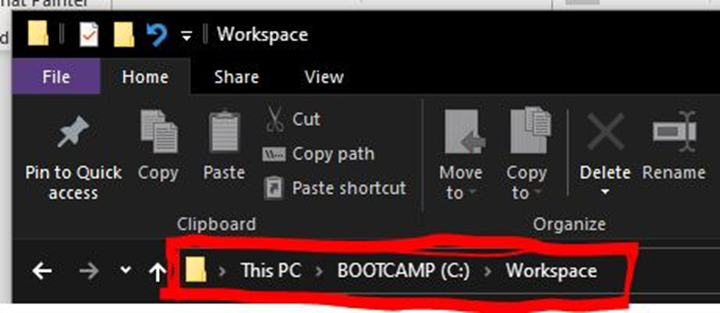
- Now we need to step into our newly created folder (same as click to open folder in file explorer) We do this by using the command:
cd workspace
Then we go to our IDE (VS code, intellij, Eclipse or whatever you use)
We create a new project, just create a simple java console application. Name it GitHubDemo.
And make sure to create it inside the folder we created above c:\Workspace\GitHubDemo
In the project we create a mainHello.java file that looks like this:
![public class mainHello { public static void main(string[] args) { printHelloWorld printer = new PrintHelloWorld(); printer.print }}](https://staticore.net/wp-content/uploads/2022/03/image-4.png)
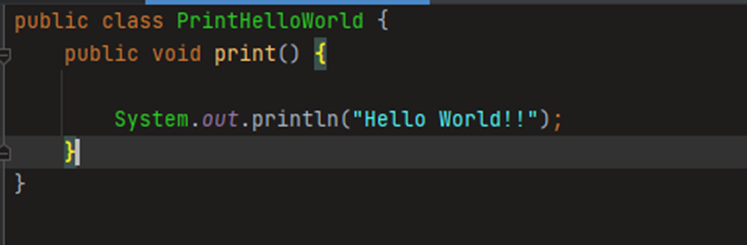
And we create a file PrintHelloWorld.java
And we are done here for now. Time to get this code up to GitHub.
Next step is to create the repository (repo)
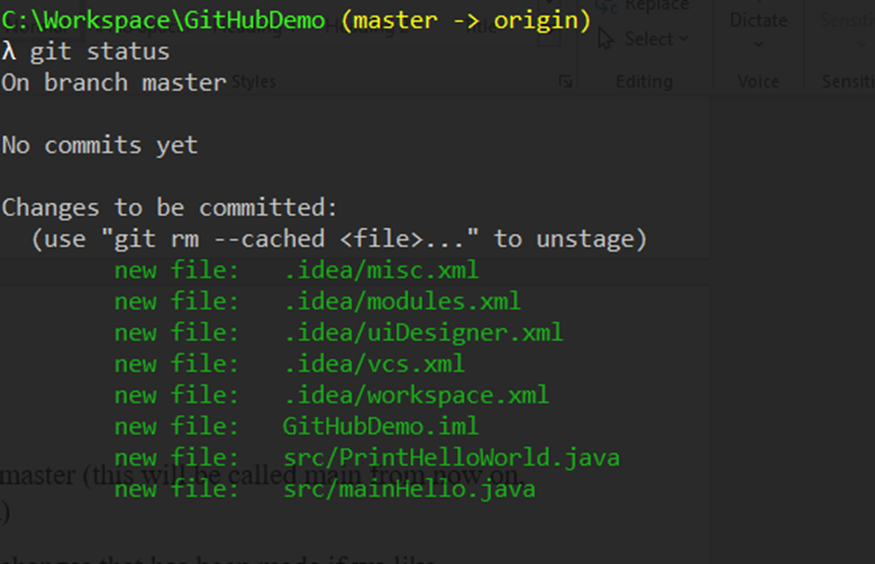
We can check to see if there is any repo in this folder by using command: git status.
And to create the repo we use the command: git init
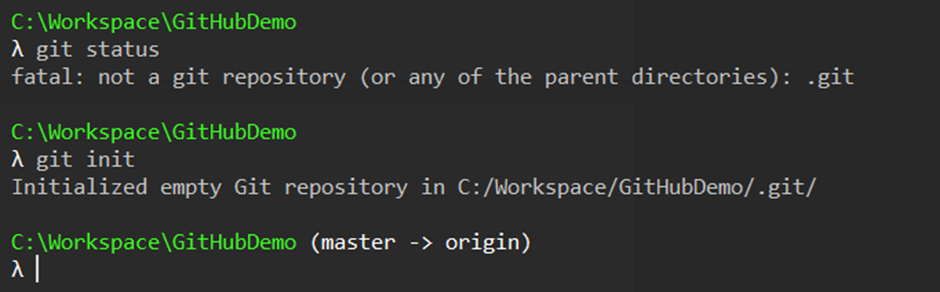
As we can see we are now in the active branch master (this will be called main from now on, master was used before but is changing to main)
We can use the commando: git status to see all changes that has been made if we like.
And then we use: git add .

Then use: git status again and we will see the files added:
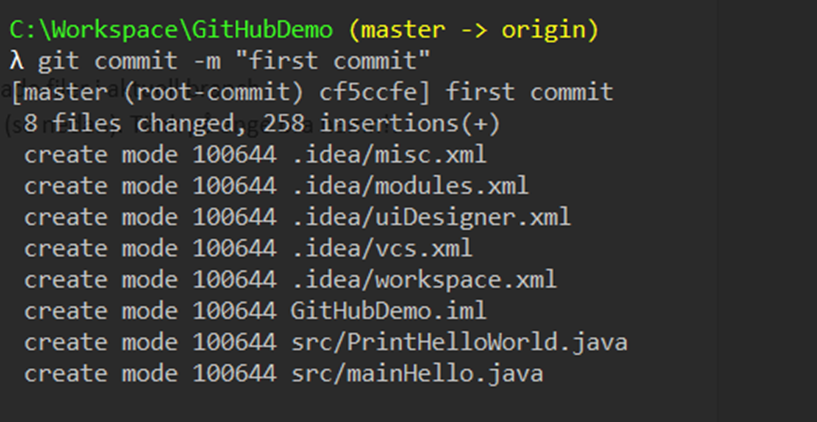
We now need to create our commit. Since this is the first commit it is common to just name it “initial commit” or “first commit”. So in the terminal write: git commit -m “initial commit”
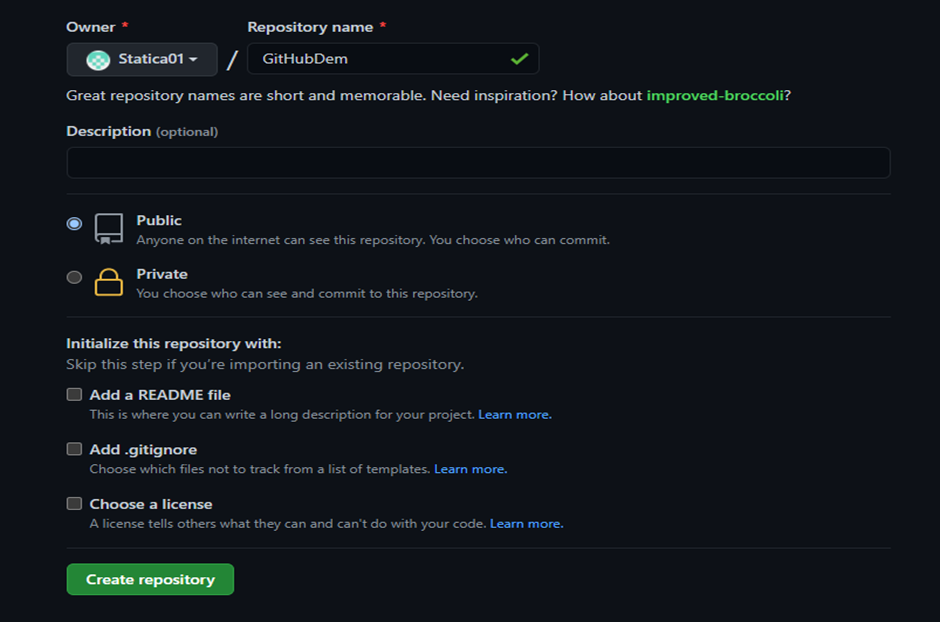
Now go to your GitHub page and create a new repo.
Log in to your account > select Repositories in the menu > click the New button.

Fill in the repository name > select private or public > click create repository button.
Copy the first line you see in the … or push existing repository from the command line.
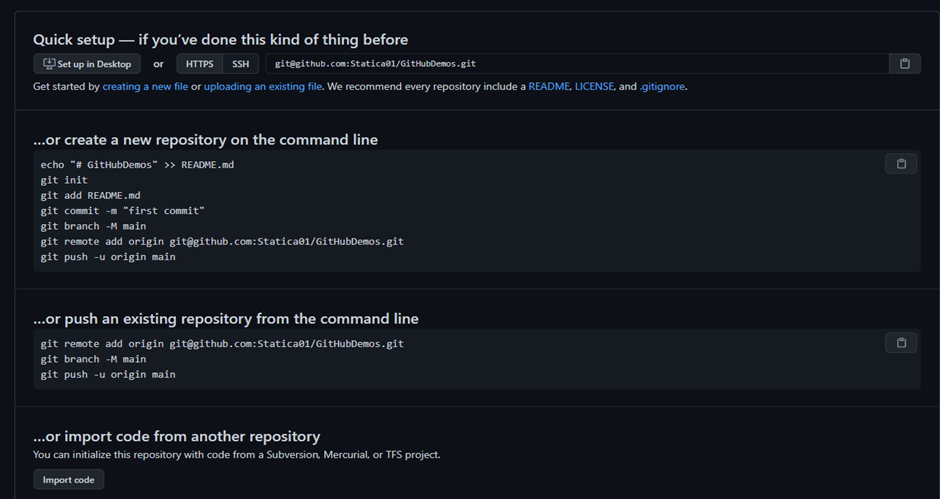
Then go back to the terminal (command prompt) and paste all three lines, one by one. You need to paste first line then hit enter, then paste next -> hit enter. Not paste all lines at once.
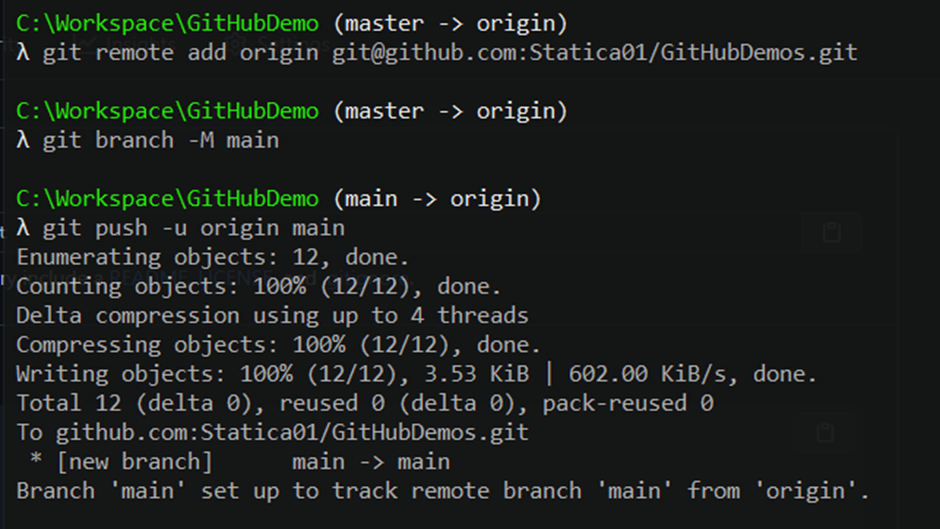
Now it is done, and we can go back to our GitHub page and refresh, then we will see our project under the repository category.
This was the first part of the tutorial. The code used can be seen at my GitHub Here
A site that gives a great hands-on learning for git: Learn git branching